Deploying Edge Native Cluster
What are we Trying to Achieve
Imagine that you’re the IT administrator for a retail company that has just been tasked with deploying to 1000 new locations this year. Your job is to deploy single-node Kubernetes clusters at the edge for each of these new stores. You’ve decided Palette will be your tool of choice and for this exercise, you’ll use VMs to test the ease of use for consistent deployments.
Prerequisites
Completion of Building Edge Native Artifacts
- Internet Access
- Palette Account
- Command line tool to access the physical or virtual hardware via ssh
- Kubectl
- Physical or Virtual Hardware that can be “Flashed” with a new OS. (x86 Based)
- DHCP is required for the physical or virtual edge device.
- An additional available IP address on the same network as your DHCP scope.
Minimum Hardware
Edge Host Node
- x86 Based Platform
- 2CPU
- 4GB Memory
- 50GB HD
- DHCP Enabled on the network
Software
This how-to guide was written with the following versions and hardware. These versions may differ slightly from what you are using.
| Palette UI | Build Host | Build Host OS | Docker Version | GIT Version |
|---|---|---|---|---|
| v3.4.25 | 4-vCPU - 8GB Memory - 100GB Hard Disk | Ubuntu 22.04.2 LTS | 23.0.1 | 2.34.1 |
These steps should be done on the build host used to complete the Building Edge Native Artifacts
Verify the images
- Verify images exist.
docker images
Sample Output
REPOSITORY          TAG                                   IMAGE ID       CREATED          SIZE
ttl.sh/ubuntu       k3s-1.26.8-v4.2.3-demo                2437e667204a   5 minutes ago    4.3GB
ttl.sh/ubuntu       k3s-1.26.8-v4.2.3-demo_linux_amd64    2437e667204a   5 minutes ago    4.3GB
ttl.sh/ubuntu       k3s-1.26.4-v4.2.3-demo                40e49b2487ee   5 minutes ago    4.31GB
ttl.sh/ubuntu       k3s-1.26.4-v4.2.3-demo_linux_amd64    40e49b2487ee   5 minutes ago    4.31GB
ttl.sh/ubuntu       k3s-1.25.2-v4.2.3-demo                4559ec6471b0   5 minutes ago    4.28GB
ttl.sh/ubuntu       k3s-1.25.2-v4.2.3-demo_linux_amd64    4559ec6471b0   5 minutes ago    4.28GB
ttl.sh/ubuntu       k3s-1.27.2-v4.2.3-demo                3087dad84bce   5 minutes ago    4.3GB
ttl.sh/ubuntu       k3s-1.27.2-v4.2.3-demo_linux_amd64    3087dad84bce   5 minutes ago    4.3GB
ttl.sh/ubuntu       k3s-1.27.5-v4.2.3-demo                67862466c987   6 minutes ago    4.3GB
ttl.sh/ubuntu       k3s-1.27.5-v4.2.3-demo_linux_amd64    67862466c987   6 minutes ago    4.3GB
ttl.sh/ubuntu       k3s-1.25.13-v4.2.3-demo               fcc51bbb4e5b   9 minutes ago    4.32GB
ttl.sh/ubuntu       k3s-1.25.13-v4.2.3-demo_linux_amd64   fcc51bbb4e5b   9 minutes ago    4.32GB
ttl.sh/ubuntu       k3s-1.24.6-v4.2.3-demo                becbaab05cf1   10 minutes ago   4.28GB
ttl.sh/ubuntu       k3s-1.24.6-v4.2.3-demo_linux_amd64    becbaab05cf1   10 minutes ago   4.28GB
earthly/buildkitd   v0.7.4                                83e74e1d7f7b   7 months ago     246MB
In the previous How-To-Guide, we used Earthly to build our artifacts. Earthly is a multi-architecture build tool. In this example we are building images for AMD64 hardware which is reflected by the tags above. In the future we will support ARM64 builds and those tags will be included. We only need to push the image tag that DOES NOT have the architecture reference i.e linux_amd64 in the above example.
The repository target above is ephemeral and images are not designed to stay for long periods of time. We are using this repository for demo and quick start purposes but it is not designed for a production environment. If you wish to use your own registry, tag the docker images appropriately and push them to that registry.
- Push each image to
ttl.sh
The image names below should be changed to match the output from above. Only the images created using the Building Edge Native Artifacts How-To-Guide need to be pushed.
docker push ttl.sh/ubuntu:k3s-1.27.2-v4.2.3-demo_linux_amd64
docker push ttl.sh/ubuntu:k3s-1.27.5-v4.2.3-demo_linux_amd64
As a reminder, ttl.sh is a short lived registry. By default these images have a default time to live of 24 hours. If you do not complete this tutorial within 24 hours of pushing these images they will no long exist and will need to be re-pushed. If you wish to use these images at a later time, we recommend pushing them to your registry.
Create a Cluster Profile in Palette
Cluster Profiles are what define the desired configuration of our Kubernetes Clusters. They are reusable abstractions of the manual configuration elements that would be done to provide consistency and repeatability.
A Cluster Profile can be reused across many clusters. For these next steps, we will build a Cluster Profile to define our OS, Kubernetes, and CNI layers.
-
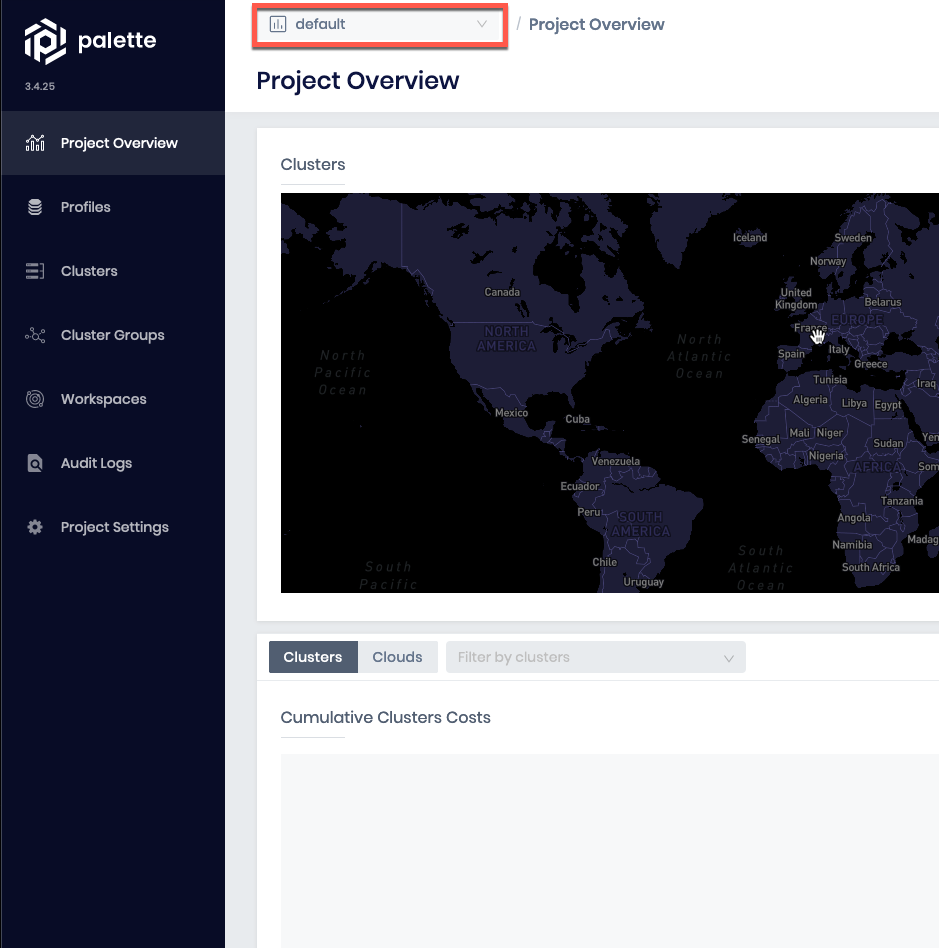
Login to Palette
-
Navigate to the
Defaultproject.
-
Navigate to
Profilesand selectAdd Cluster Profile -
Provide a name and select
Fullas the Type

- For the name we often suggest making it something that describes the deployment type such as
ubuntu-k3s
Click Next
- Choose
Edge Nativeas the Infrastructure Provider
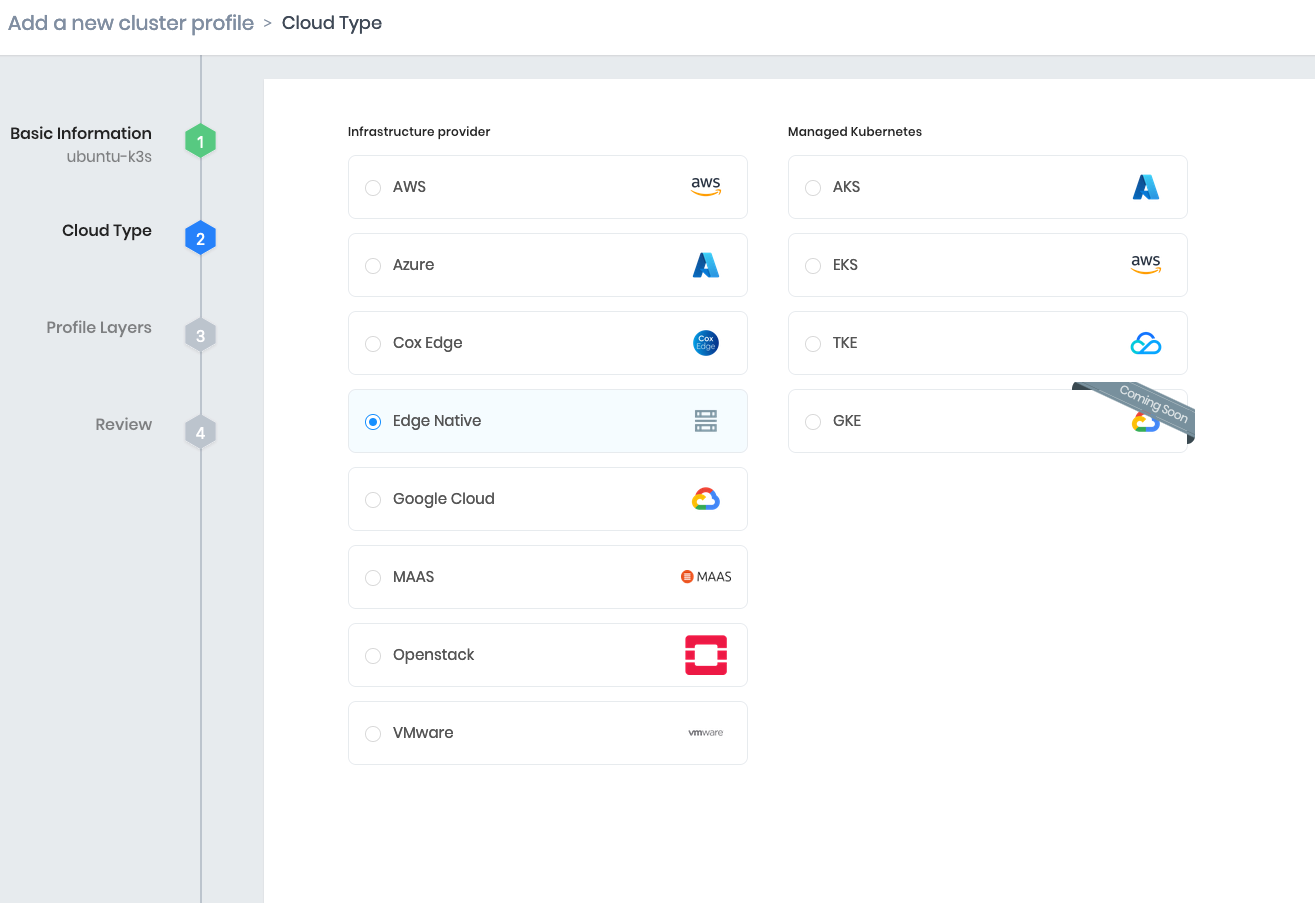
Click Next
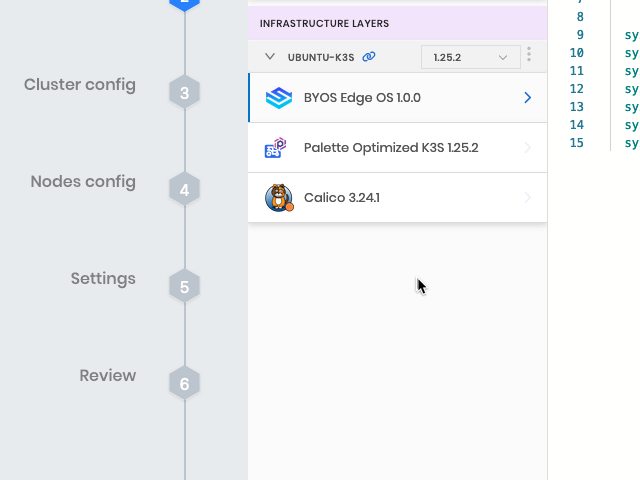
-
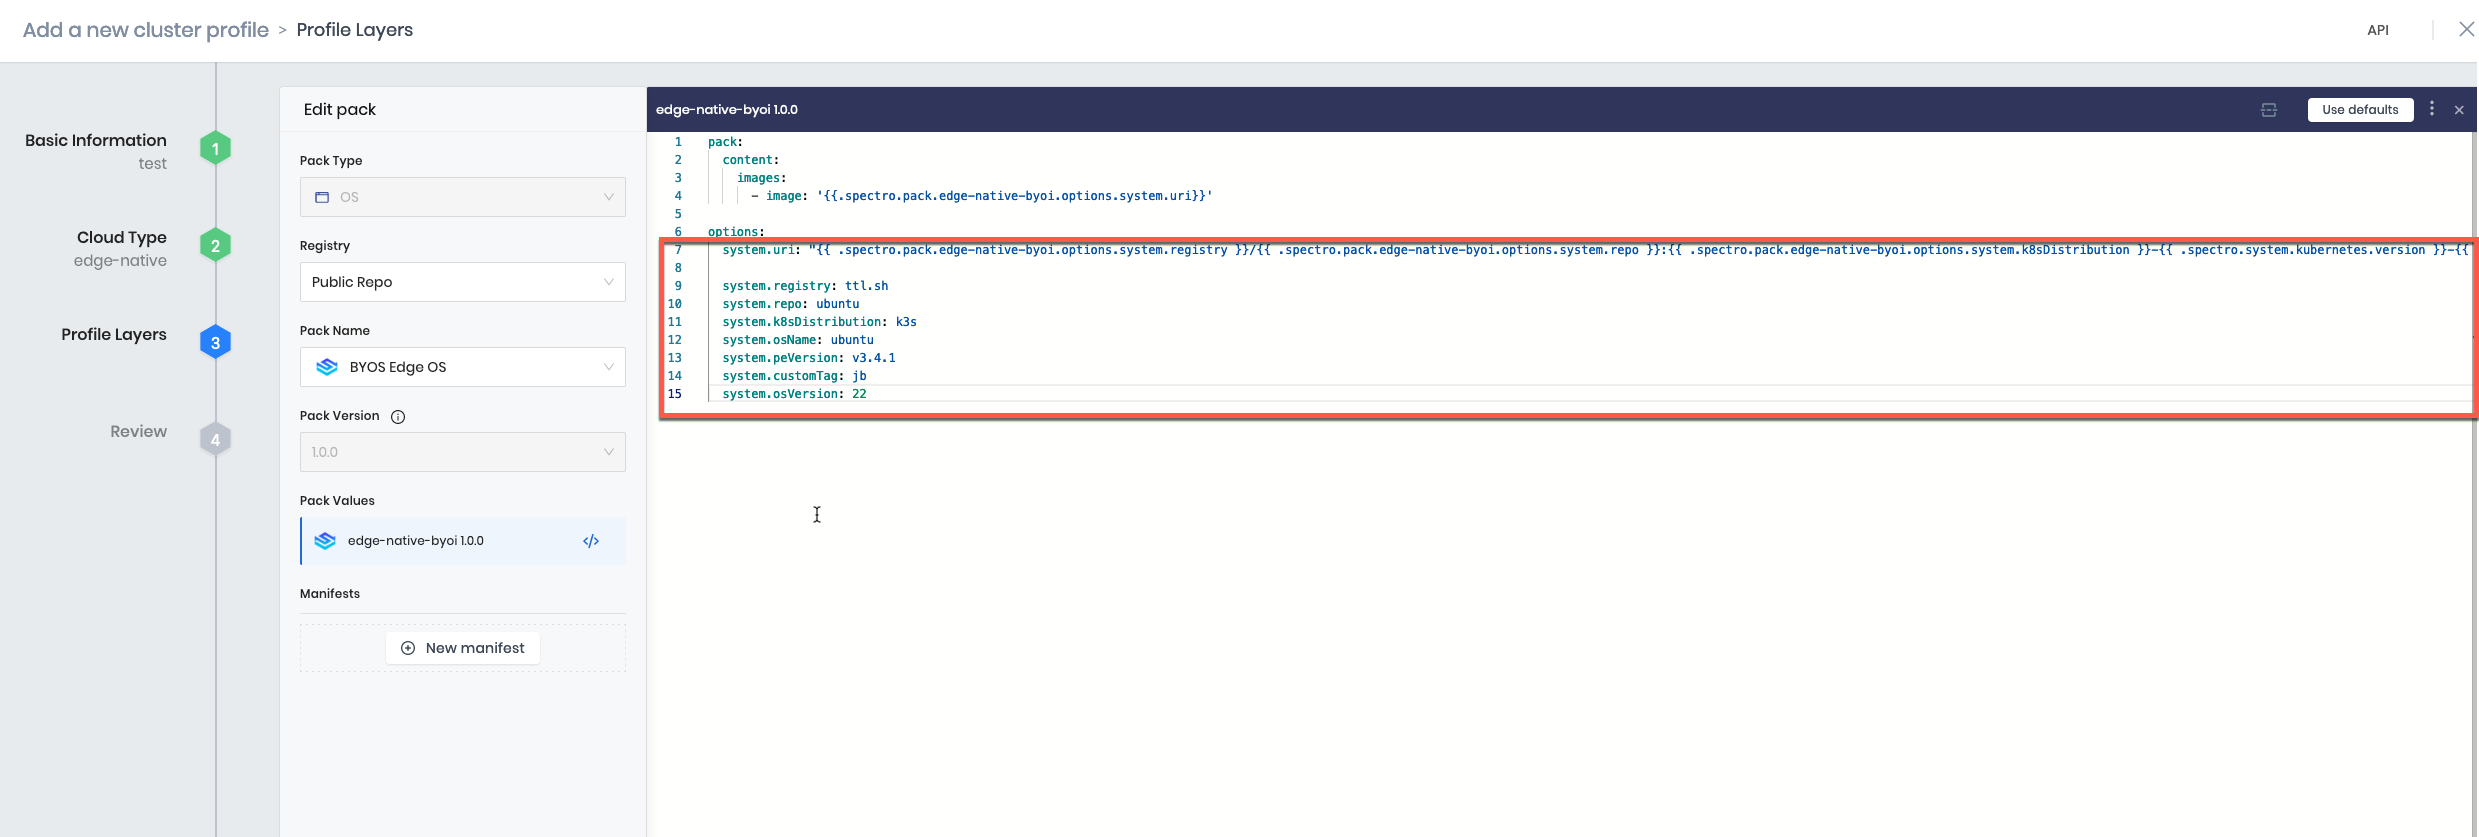
Select
Public Repofrom the Registry dropdown and set the Pack Type toBYOS Edge OS -
Copy the output from Building Edge Native Artifacts and replace everything below
options.
Make sure the formatting is preserved. This is YAML, Palette has YAML validation. If errors are displayed they should be corrected before proceeding.
Below is a Sample of the output from Building Edge Native Artifacts
##########################################################################################################

PASTE THE CONTENT BELOW INTO YOUR CLUSTER PROFILE IN PALETTE REPLACING ALL THE CONTENTS IN THE PROFILE

##########################################################################################################


pack:
  content:
    images:
      - image: "{{.spectro.pack.edge-native-byoi.options.system.uri}}"
  # Below config is default value, please uncomment if you want to modify default values
  #drain:
    #cordon: true
    #timeout: 60 # The length of time to wait before giving up, zero means infinite
    #gracePeriod: 60 # Period of time in seconds given to each pod to terminate gracefully. If negative, the default value specified in the pod will be used
    #ignoreDaemonSets: true
    #deleteLocalData: true # Continue even if there are pods using emptyDir (local data that will be deleted when the node is drained)
    #force: true # Continue even if there are pods that do not declare a controller
    #disableEviction: false # Force drain to use delete, even if eviction is supported. This will bypass checking PodDisruptionBudgets, use with caution
    #skipWaitForDeleteTimeout: 60 # If pod DeletionTimestamp older than N seconds, skip waiting for the pod. Seconds must be greater than 0 to skip.
options:
  system.uri: "{{ .spectro.pack.edge-native-byoi.options.system.registry }}/{{ .spectro.pack.edge-native-byoi.options.system.repo }}:{{ .spectro.pack.edge-native-byoi.options.system.k8sDistribution }}-{{ .spectro.system.kubernetes.version }}-{{ .spectro.pack.edge-native-byoi.options.system.peVersion }}-{{ .spectro.pack.edge-native-byoi.options.system.customTag }}"

  system.registry: ttl.sh
  system.repo: ubuntu
  system.k8sDistribution: k3s
  system.osName: ubuntu
  system.peVersion: v4.2.3
  system.customTag: jb
  system.osVersion: 22
Click Next Layer
- Select
Public Repofrom the Registry dropdown, the Pack Type toPalette Optimized K3S, and the Pack Version to1.24.6
The cluster-cidr and service-cidr should be changed if needed should they overlap with your network. This is to prevent any routing conflicts in the internal pod networking.

Click Next Layer
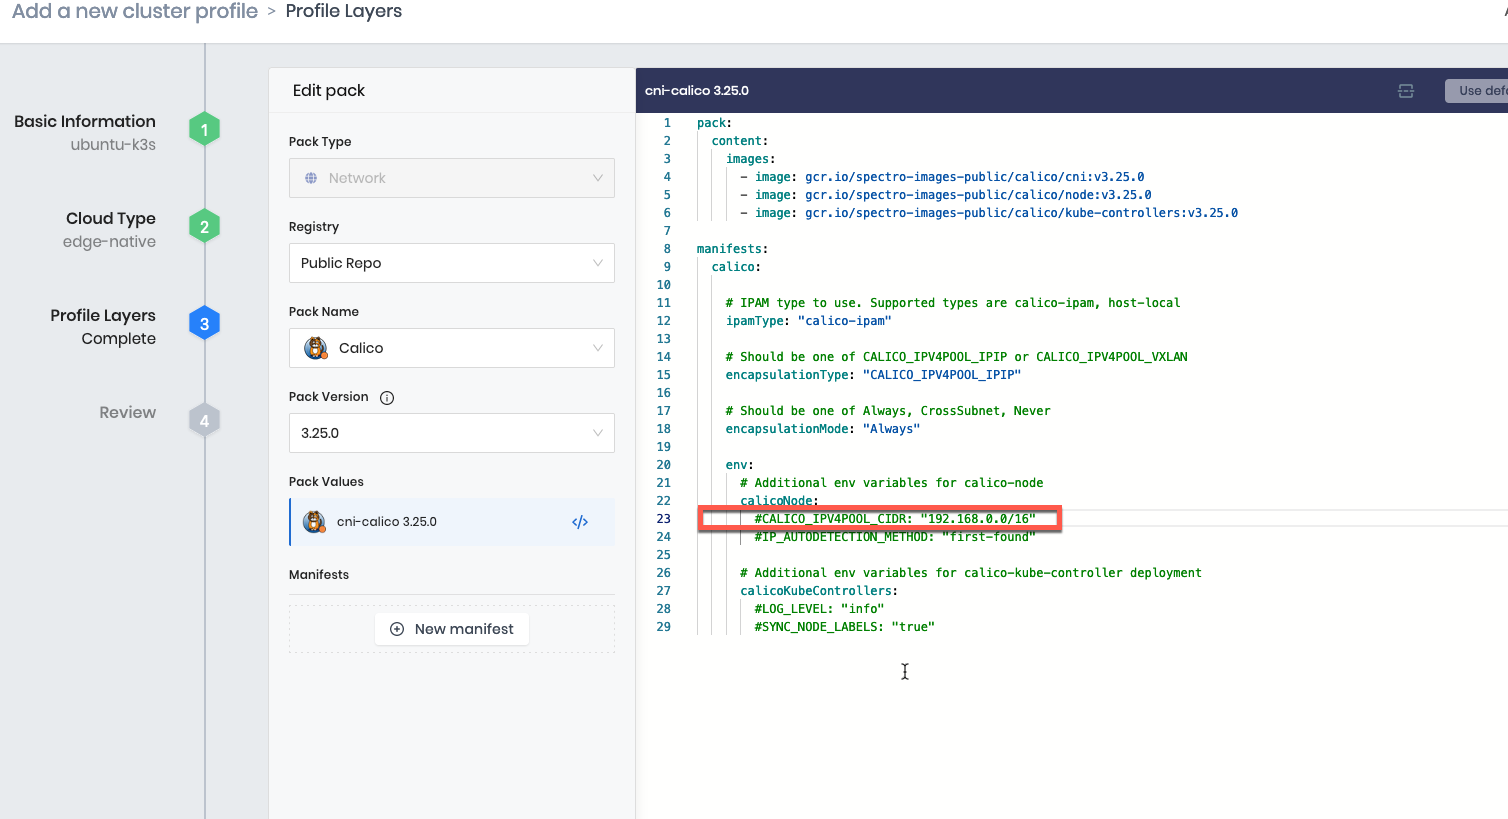
- Select
Public Repofrom the Registry dropdown, the Pack Type toCalico, and the Pack Version to3.25.0
If you changed the cluster-cidr in the previous step, line 23 should be un-commented (remove the #) and the IP Address should be changed to match your cluster-cidr address pool. If you made no changes in the previous step, nothing is required to be changed here.
Click Confirm
Click Next
Click Finish Configuration

Testing Environment
Pick your testing environment below
Edge Native - VMware
Additional Prerequisites
Software
Jump Host
- x86 Based Platform
- 4-vCPU
- 8GB Memory
- 100GB Hard Disk
This tutorial was written with the following versions:
Ubuntu
No LSB modules are available.
Distributor ID: Ubuntu
Description:    Ubuntu 22.04.2 LTS
Release:        22.04
Codename:       jammy
Docker CE
Docker version 23.0.1, build a5ee5b1
Git cli
git version 2.34.1
This tutorial assumes that the machine you are doing this on has connectivity to vSphere, the user account in vSpere has the appropriate permission, and is functioning with enough capacity to support the number of nodes you are testing on. Configuration of vSphere and ESXi is out of scope.
Create the Virtual Machine Template
- Navigate to the CanvOS directory you created in the Building Edge Native Artifacts
cd CanvOS
This tutorial assumes the path of your ISO is in the following path. Adjustments may be needed depending on your environment.
Path= CanvOS/build
- Run the Tutorials Docker image
docker run -it -v "${PWD}/build:/edge-native/vmware/packer/build" 3pings/pwp-tutorials:latest
- Confirm the ISO is mounted in the
buildfolder.
ls -al edge-native/vmware/packer/build
SAMPLE OUTPUT
964eaf86f646:/# ls -al edge-native/vmware/packer/build
total 1427216
drwxr-xr-x    2 root     root          4096 May 25 17:11 .
drwxrwxr-x    1 root     root          4096 May 25 17:24 ..
-rw-r--r--    1 root     root     1461452800 Apr 16  2020 palette-edge-installer.iso
-rw-r--r--    1 root     root            93 Apr 16  2020 palette-edge-installer.iso.sha256
- Change into the Packer directory
cd edge-native/vmware/packer/
- Modify the
env_variables.shfile to add your Vsphere information.
These values will be used for both creating the template with Packer and deploying the VMs with GOVC in a later step.
vi .env
- Press
ito enable editing.
#!/bin/bash
export vcenter_server="Enter a value"       # Example: vcenter.spectrocloud.dev
export vcenter_username="Enter a value"
export vcenter_password="Enter a value"
export vcenter_datacenter="Enter a value"
export vcenter_datastore="Enter a value"
export vcenter_resource_pool="Enter a value"
export vcenter_folder="Enter a value"
export vcenter_cluster="Enter a value"
export vcenter_network="Enter a value"


export PKR_VAR_vcenter_server=${vcenter_server}
export PKR_VAR_vcenter_username=${vcenter_username}
export PKR_VAR_vcenter_password=${vcenter_password}
export PKR_VAR_vcenter_datacenter=${vcenter_datacenter}
export PKR_VAR_vcenter_datastore=${vcenter_datastore}
export PKR_VAR_vcenter_resource_pool=${vcenter_resource_pool}
export PKR_VAR_vcenter_folder=${vcenter_folder}
export PKR_VAR_vcenter_cluster=${vcenter_cluster}
export PKR_VAR_vcenter_network=${vcenter_network}
- To save with VIM, press
escthen type:wq!and pressenter
Depending on your editor the way you save may be different.
The default template sizing is set in the vsphere.hcl file. Should you need to modify the sizing they should be edited in the file.
DEFAULTS
vm_cpu_sockets = 4
vm_cpu_cores = 1
vm_mem_size = 8192
vm_disk_size = 51200
- Set the environment variables.
source ./.env
- Run the
packer buildcommand to create the template.
packer build --var-file=vsphere.hcl build.pkr.hcl
This build process can take 7-10 minutes depending on your network configuration and capabilities. Be patient. The Packer Builder will finish on its own.
SAMPLE OUTPUT
==> vsphere-iso.edge-template: Power on VM...
    vsphere-iso.edge-template: Please shutdown virtual machine within 10m0s.
==> vsphere-iso.edge-template: Deleting Floppy drives...
==> vsphere-iso.edge-template: Eject CD-ROM drives...
==> vsphere-iso.edge-template: Deleting CD-ROM drives...
==> vsphere-iso.edge-template: Convert VM into template...
Build 'vsphere-iso.edge-template' finished after 7 minutes 13 seconds.

==> Wait completed after 7 minutes 13 seconds

==> Builds finished. The artifacts of successful builds are:
--> vsphere-iso.edge-template: palette-edge-template
Clone the VM Template
Now that we have the template built we can create our actual edge host images. To do this, we will clone the template.
These next steps will use the GOVC tool built into the Docker image.
- Change into the
clone_vm_templatedirectory
cd ../clone_vm_template/
- Modify the values for your environment as needed. Make sure to provide/update the VM_PREFIX if needed.
We are using the values set in the previous step as environment variables.
vi setenv.sh
| Parameter | Description |
|---|---|
| NO_OF_VMS | Number of VMs to be created |
| VM_PREFIX | Name to prefix the VMs |
| INSTALLER_TEMPLATE | Name of the template used to clone |
SAMPLE
#!/bin/bash
# Number of VMs to provision
export NO_OF_VMS=3
export VM_PREFIX="demo"
export INSTALLER_TEMPLATE="palette-edge-template"

##################################################
#### DO NOT MODIFY BELOW HERE ####################
##################################################

# GOVC Properties
# vCenter Endpoint
export GOVC_URL="https://${vcenter_server}"     # Use HTTPS. For example, https://vcenter.company.com
export GOVC_USERNAME="${vcenter_username}"
export GOVC_PASSWORD="${vcenter_password}"
export GOVC_INSECURE=1 #1 if insecure
export GOVC_DATACENTER="${vcenter_datacenter}"
export GOVC_DATASTORE="${vcenter_datastore}"
export GOVC_NETWORK="${vcenter_network}"
export GOVC_RESOURCE_POOL="${vcenter_resource_pool}"
export GOVC_FOLDER="${vcenter_folder}"
- Press
ito enable editing. - To save with VIM, press
escthen type:wq!and pressenter
The default is to create 3 VMs, if you are limited on resources then a single node is sufficient to complete this tutorial.
- Create the VMS
./deploy-edge-host.sh
SAMPLE OUTPUT
Cloned VM jb-test-3
Powering on VM jb-test-3
Powering on VirtualMachine:vm-6627... OK
Getting UUID jb-test-3
Edge Host ID   VM jb-test-3 : edge-c3653842efa8744fce4eb874489dc8ce
Prerequisites
Completion of Building Edge Native Artifacts
Hardware
Edge Host Node
- x86 Based Platform
- 4CPU
- 8GB Memory
- 50GB HD
- DHCP Enabled on the network
Testing Environment
First, we need to set up our testing environment.
Pick your testing environment below
Edge Native - Virtual Box
Additional Prerequisites
Installed Software
VirtualBox
Network Requirements
1 Free Additional IP Address on the same subnet as your desktop
DHCP Enabled
Hardware Requirements
Enough capacity to support:
- 2vCPU
- 4GB Memory
- 50GB HD (this will not all be allocated)
This Tutorial was written using the following versions:
VirtualBox 7.0
Virtual Machine Resources (x86 ONLY)
- 2vCPU
- 4GB Memory
- 50GB HD (this will not all be allocated)
Completion of the Building Edge Native Artifacts How To
- This is a prerequisite as it creates the provider and installer images used in this tutorial.
Build the VirtualBox VM
- Get installer ISO
- Download the installer ISO that was created in the Building Edge Native Artifacts
- Launch the Virtual Box Application.
- Create a New Virtual Machine.
ClickNew Virtual Machine- Give it a name such as
Palette Edge - Select the
ISO Imageyou downloaded in step one. - Set the
TypetoLinuxand theVersiontoUbuntu (64-bit) - Click
Next
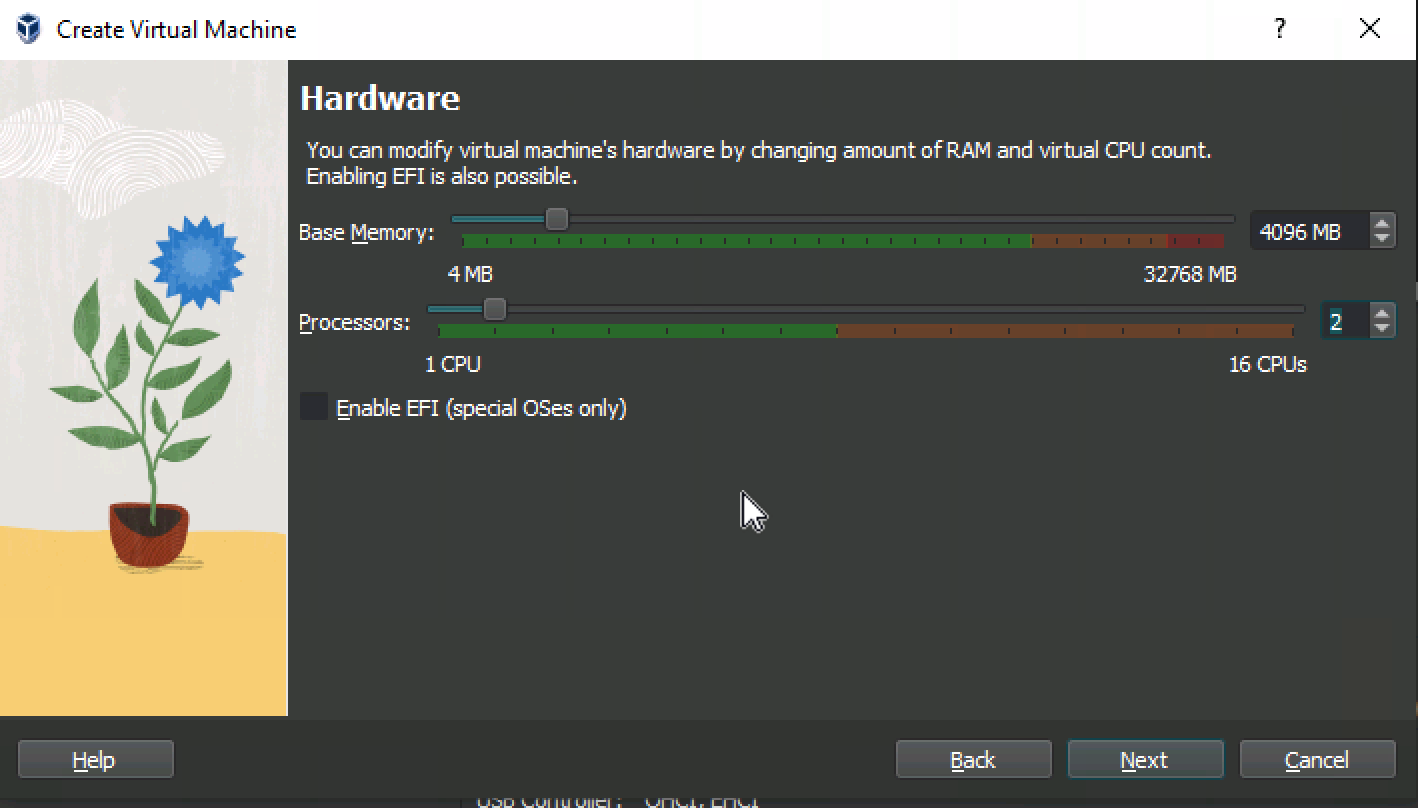
- Adjust the Virtual Machine Memory and CPU.
- 4096MB Memory (4GB)
- 2 CPU
These are the minimums. In a production environment these would vary by requirements.
- Click
Next
- Adjust the Disk Size.
- Set the Hard Disk to
50GB
Make sure the `Pre-Allocate Full Size` is NOT checked.

-
Click
Next -
Confirm your settings
-
Click
Finish
- Update VM Settings.
-
Select/Highlight the VM you just created.
Be Careful not to double click the vm as this will start it. We will do that in a later step. -
Click
Settings -
Select
Network -
Change the
Attached to:fromNATtoBridged Adapter
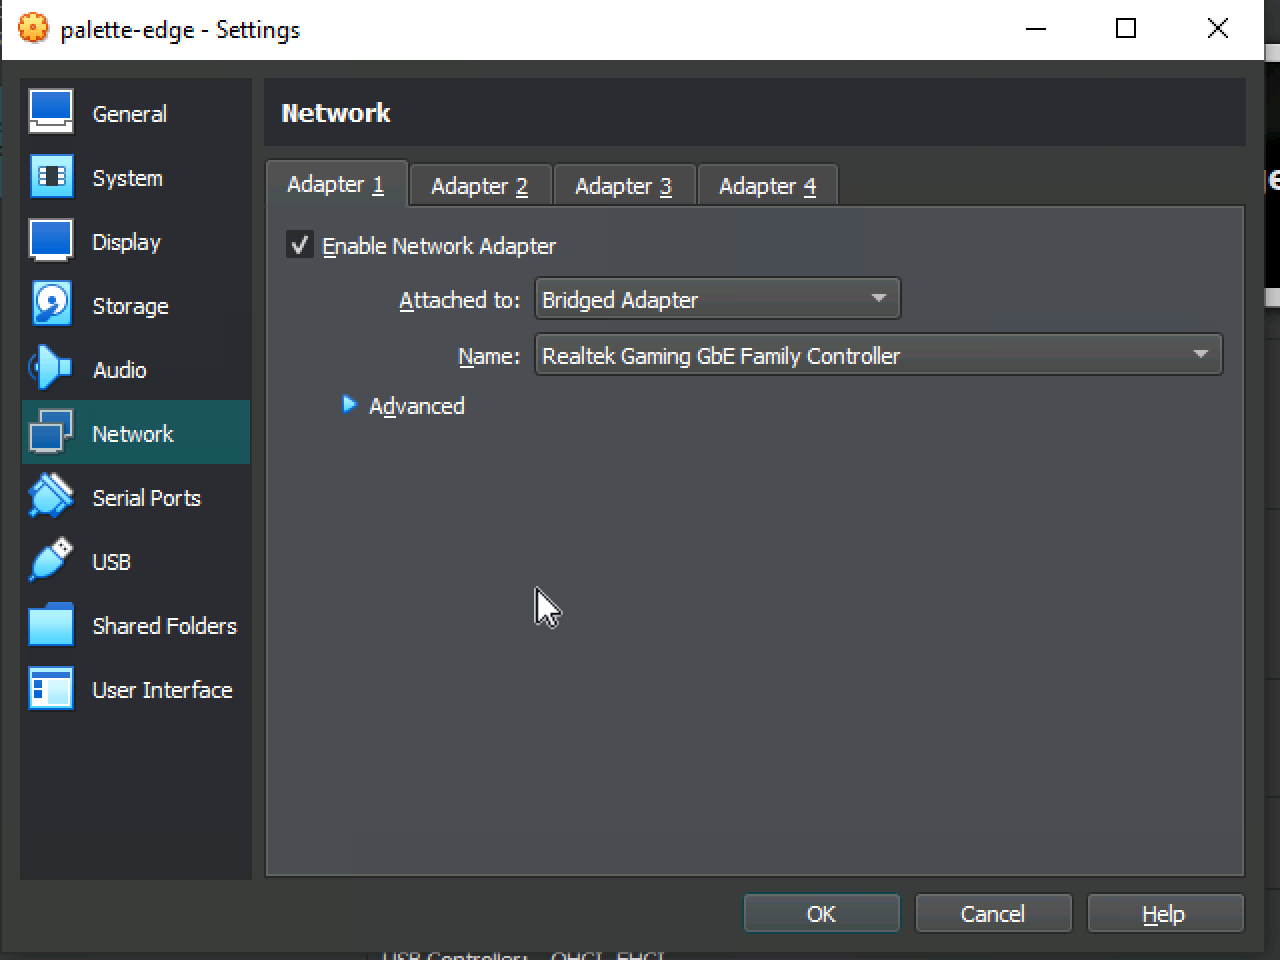
- Click
OK
- Power on the VM.
- Click
Start
The provisioning process takes around 5 minutes. The device will shut down when it is complete. If you find it is taking longer, you can view the log messages by pressing ALT + F1.
When the device shuts down, the provisioning is complete.
- Remove the ISO.
- Select/Highlight the VM you just created.
Be Careful not to double click the vm as this will start it. We will do that in a later step. - Click
settings - Select
Storage - Highlight the ISO we connected earlier
palette-edge-installer.iso - Select the
Remove Attachmenticon
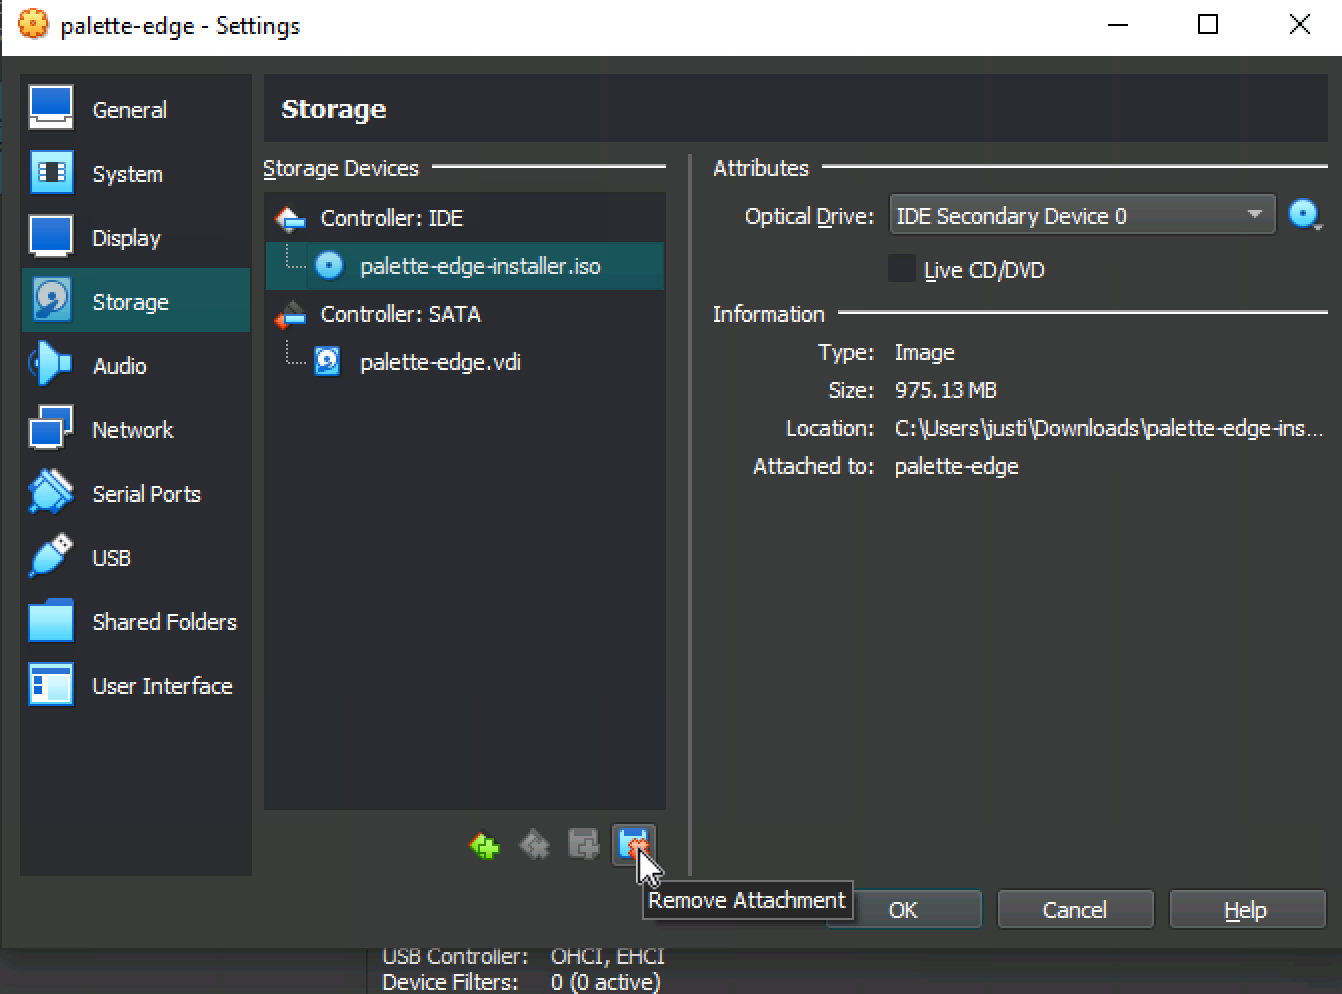
- Confirm with the pop up by selecting
Remove - Select
Okto close the settings
- Start the VM
- Highlight the VM we created
- Click
Start
The device will boot and get an IP address from the bridged network of the host machine. This address should be on the same subnet as the host machine.
You should have a screen similar to this. The IP address of the machine is printed at the top.
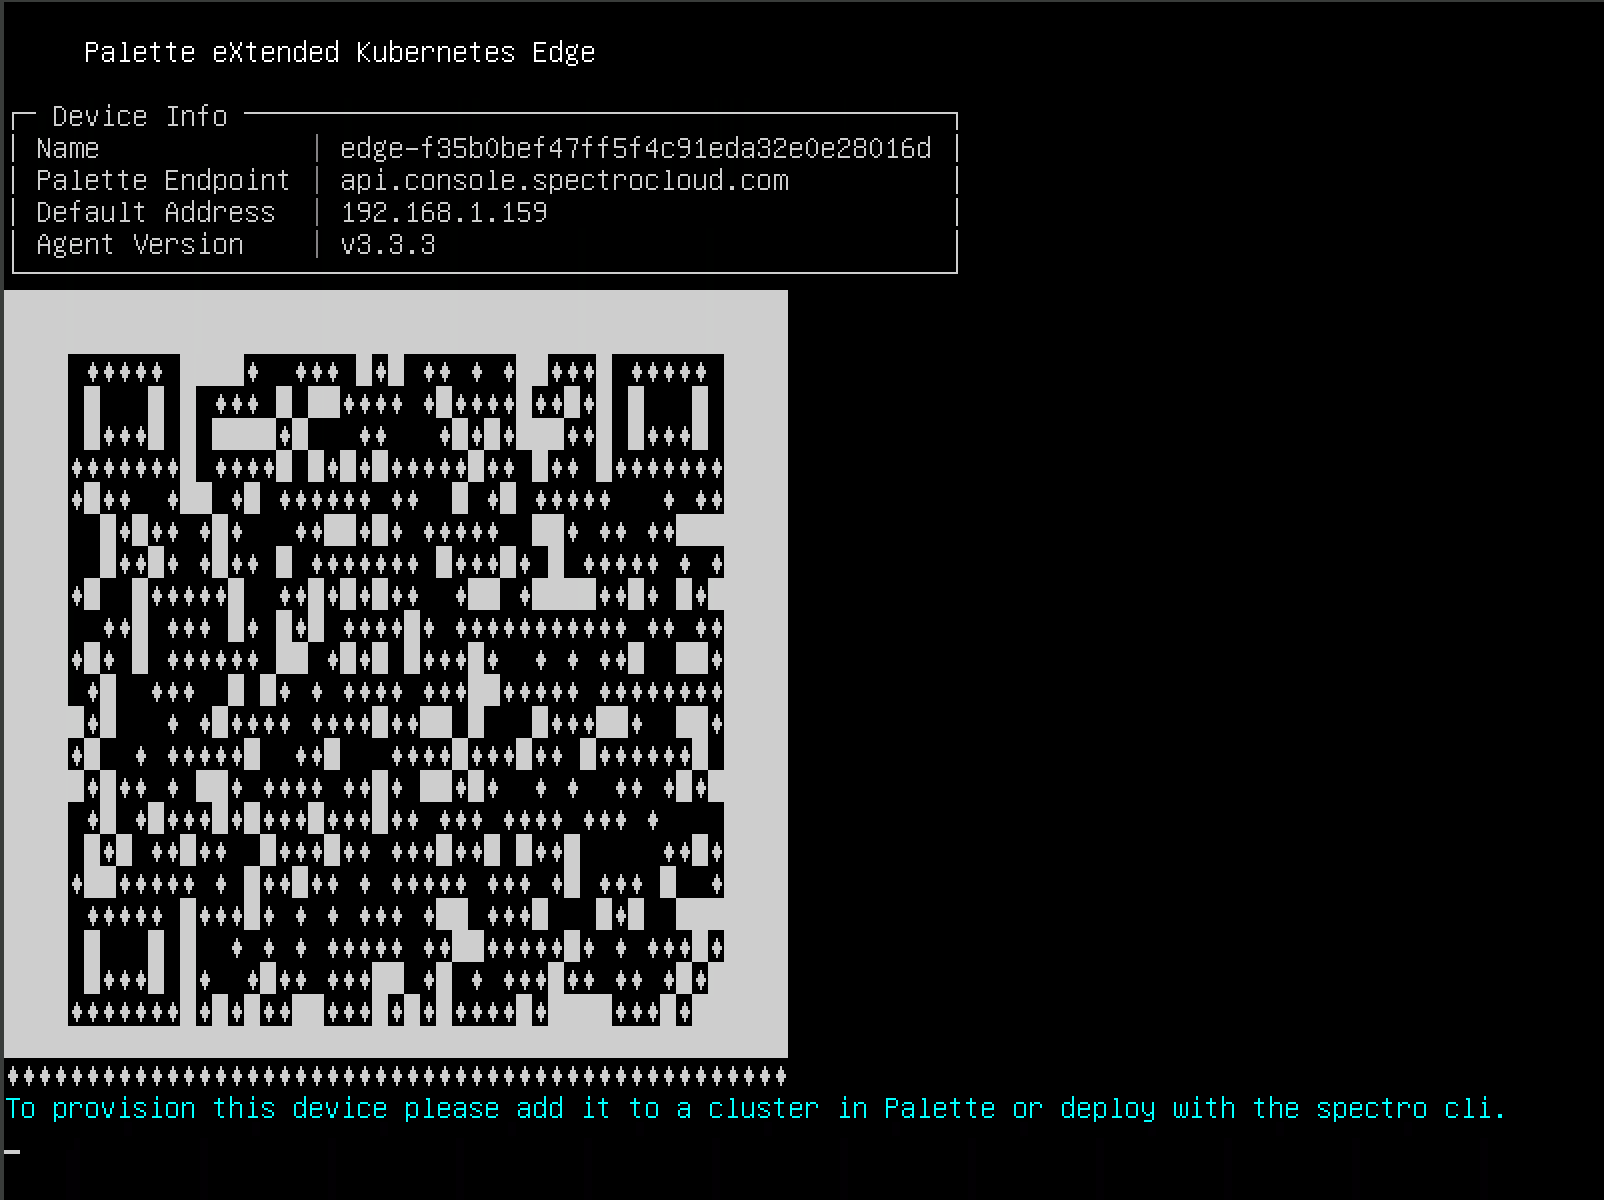
The device should auto register.
Confirm the VM Registration
The nodes will auto-register because of the token provided in the user-data file when we created the ISO in the Building Edge Native Artifacts
This makes deployments touchless from the perspective of the end user as no monitor or keyboard is required. We can confirm this after a few minutes by logging into Palette.
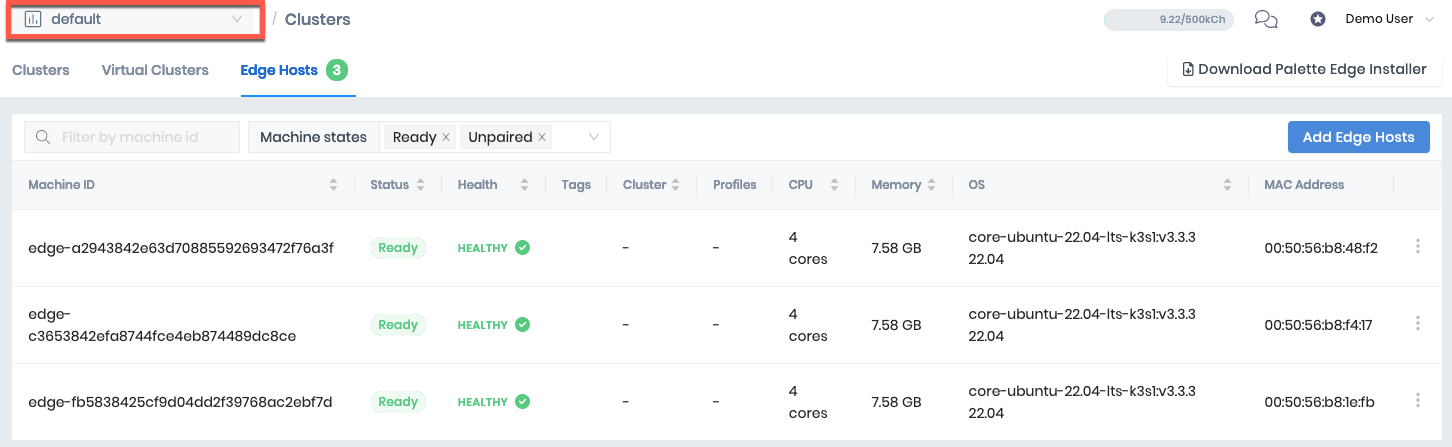
-
Log into Palette
-
Navigate to
Cluster - Edge Hoststo view the hosts registered.
Make sure you are in the correct project for the auto-registration token you built the installer image with.
Create the Edge Native Cluster
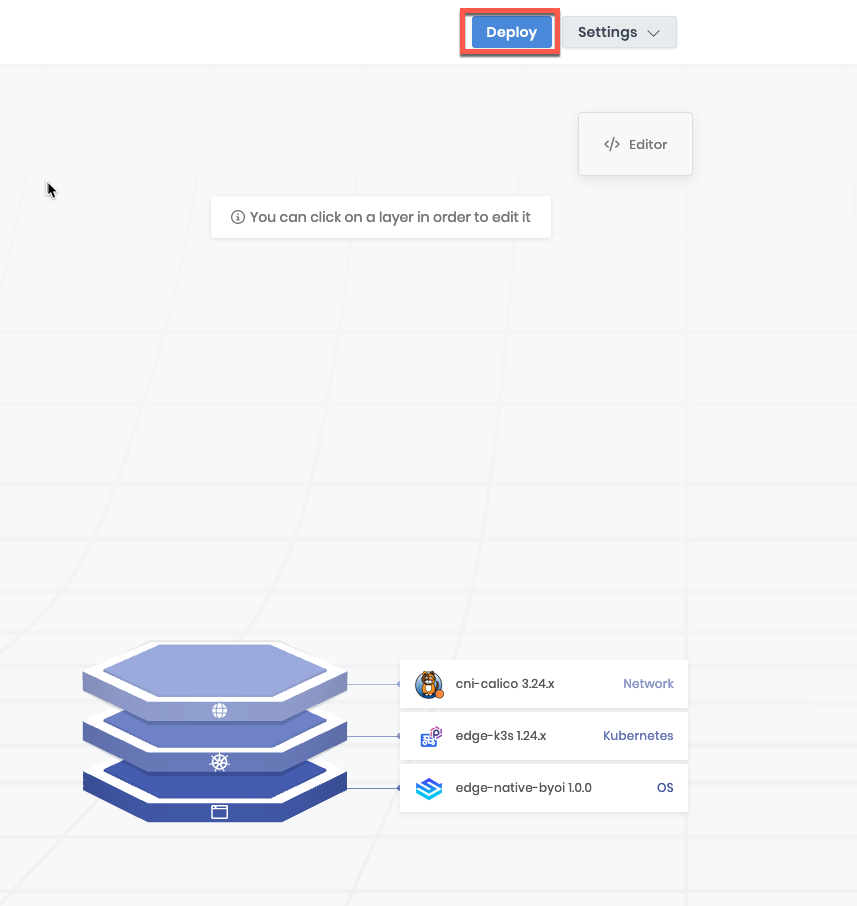
- Select the Cluster Profile we created in Create a Cluster Profile in Palette
Deploy
-
Click
Okay -
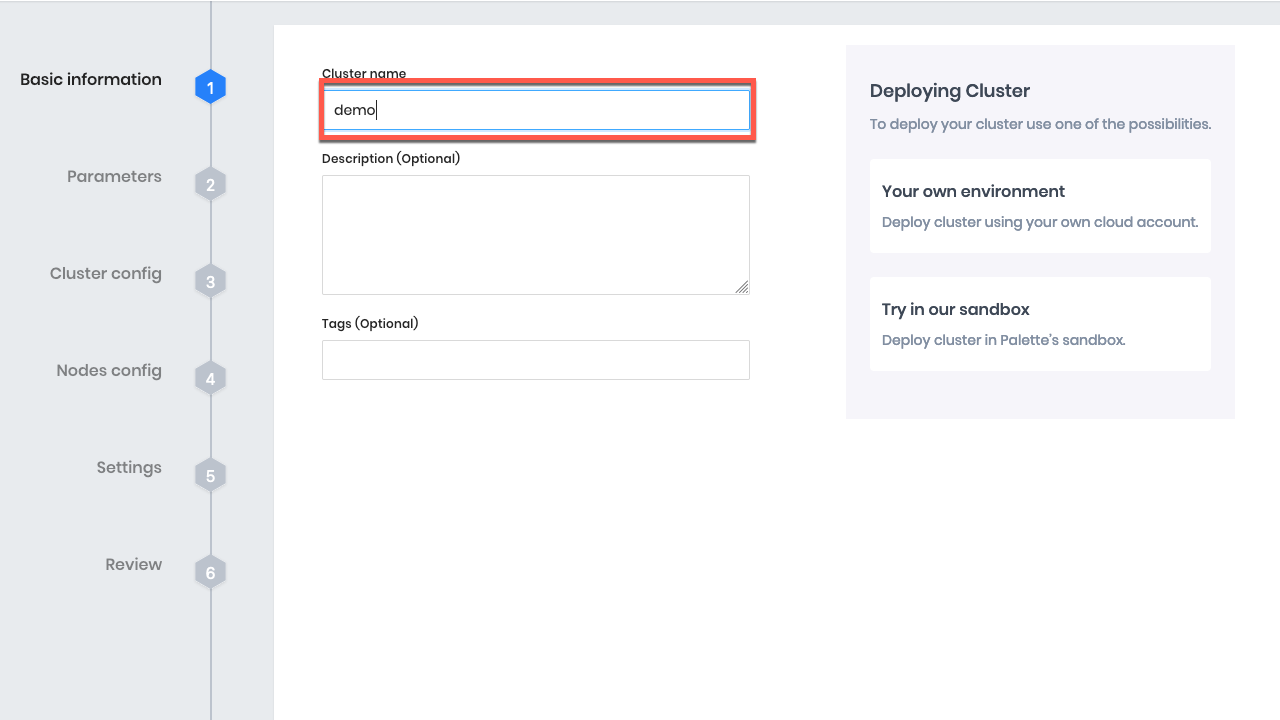
Provide a Name and click
Next
- Confirm our profile matches the profile we created earlier. Because we are creating this from the profile it is automatically populated. If you create this cluster from the
Clustertab you would need to select the correct profile.
Click Next
- Provide a Virtual IP Address. This address should be an unused address on the same network as your edge hosts. The virtual IP is a floating IP address leveraged by Kubevip to provide high availability to the Kubernetes API.
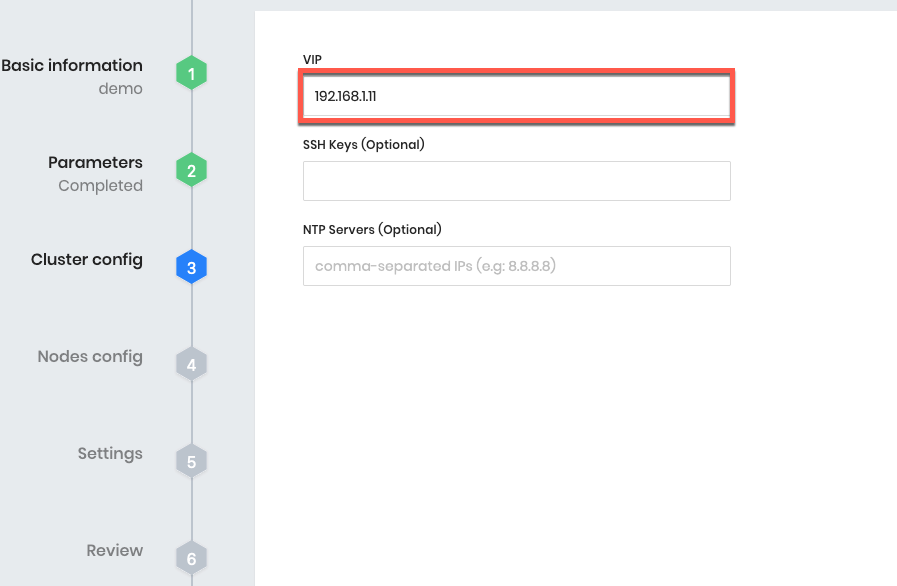
Click Next
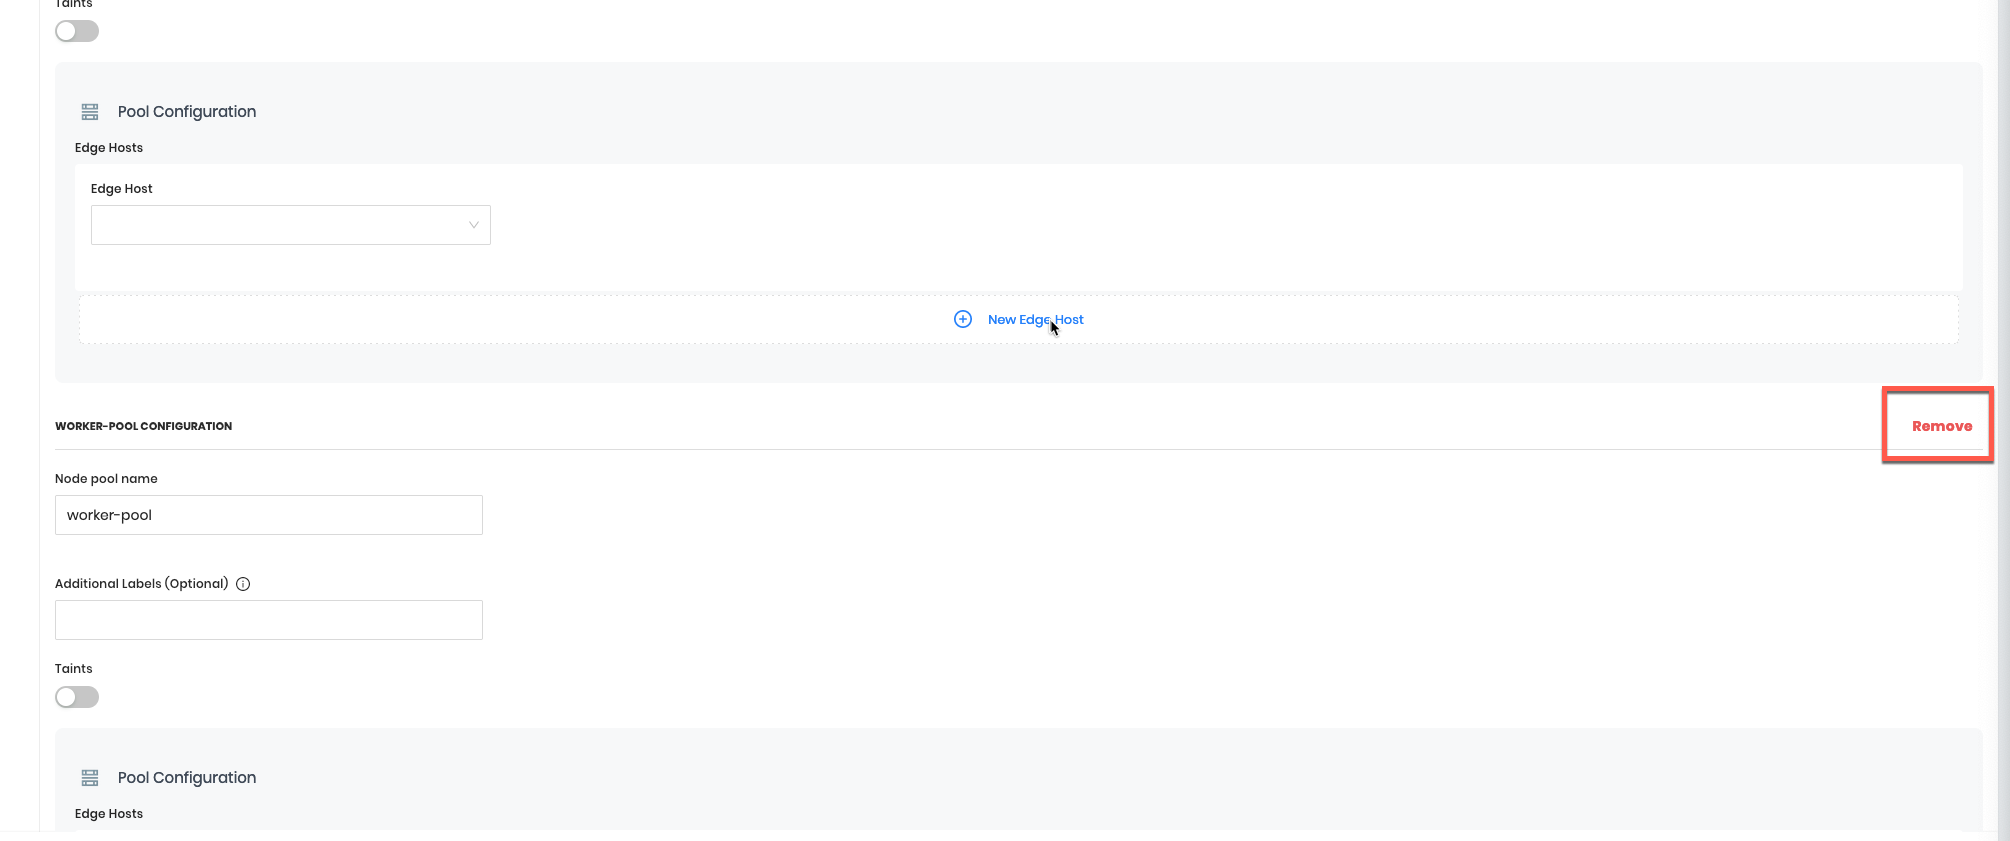
- Configure your nodes. For the purposes of this tutorial we are creating a single node pool with 3 control-plane nodes. For this reason, we can remove the second node pool.
Click Remove
- Add additional nodes to the control-plane pool
Click New Edge Host twice to add the additional control-plane nodes. From the dropdown select an item from the list for each Edge Host. As all of these hosts are the same, the order does not matter.
We could populate a static IP here if needed. For the purposes of this tutorial, a static IP is not needed.
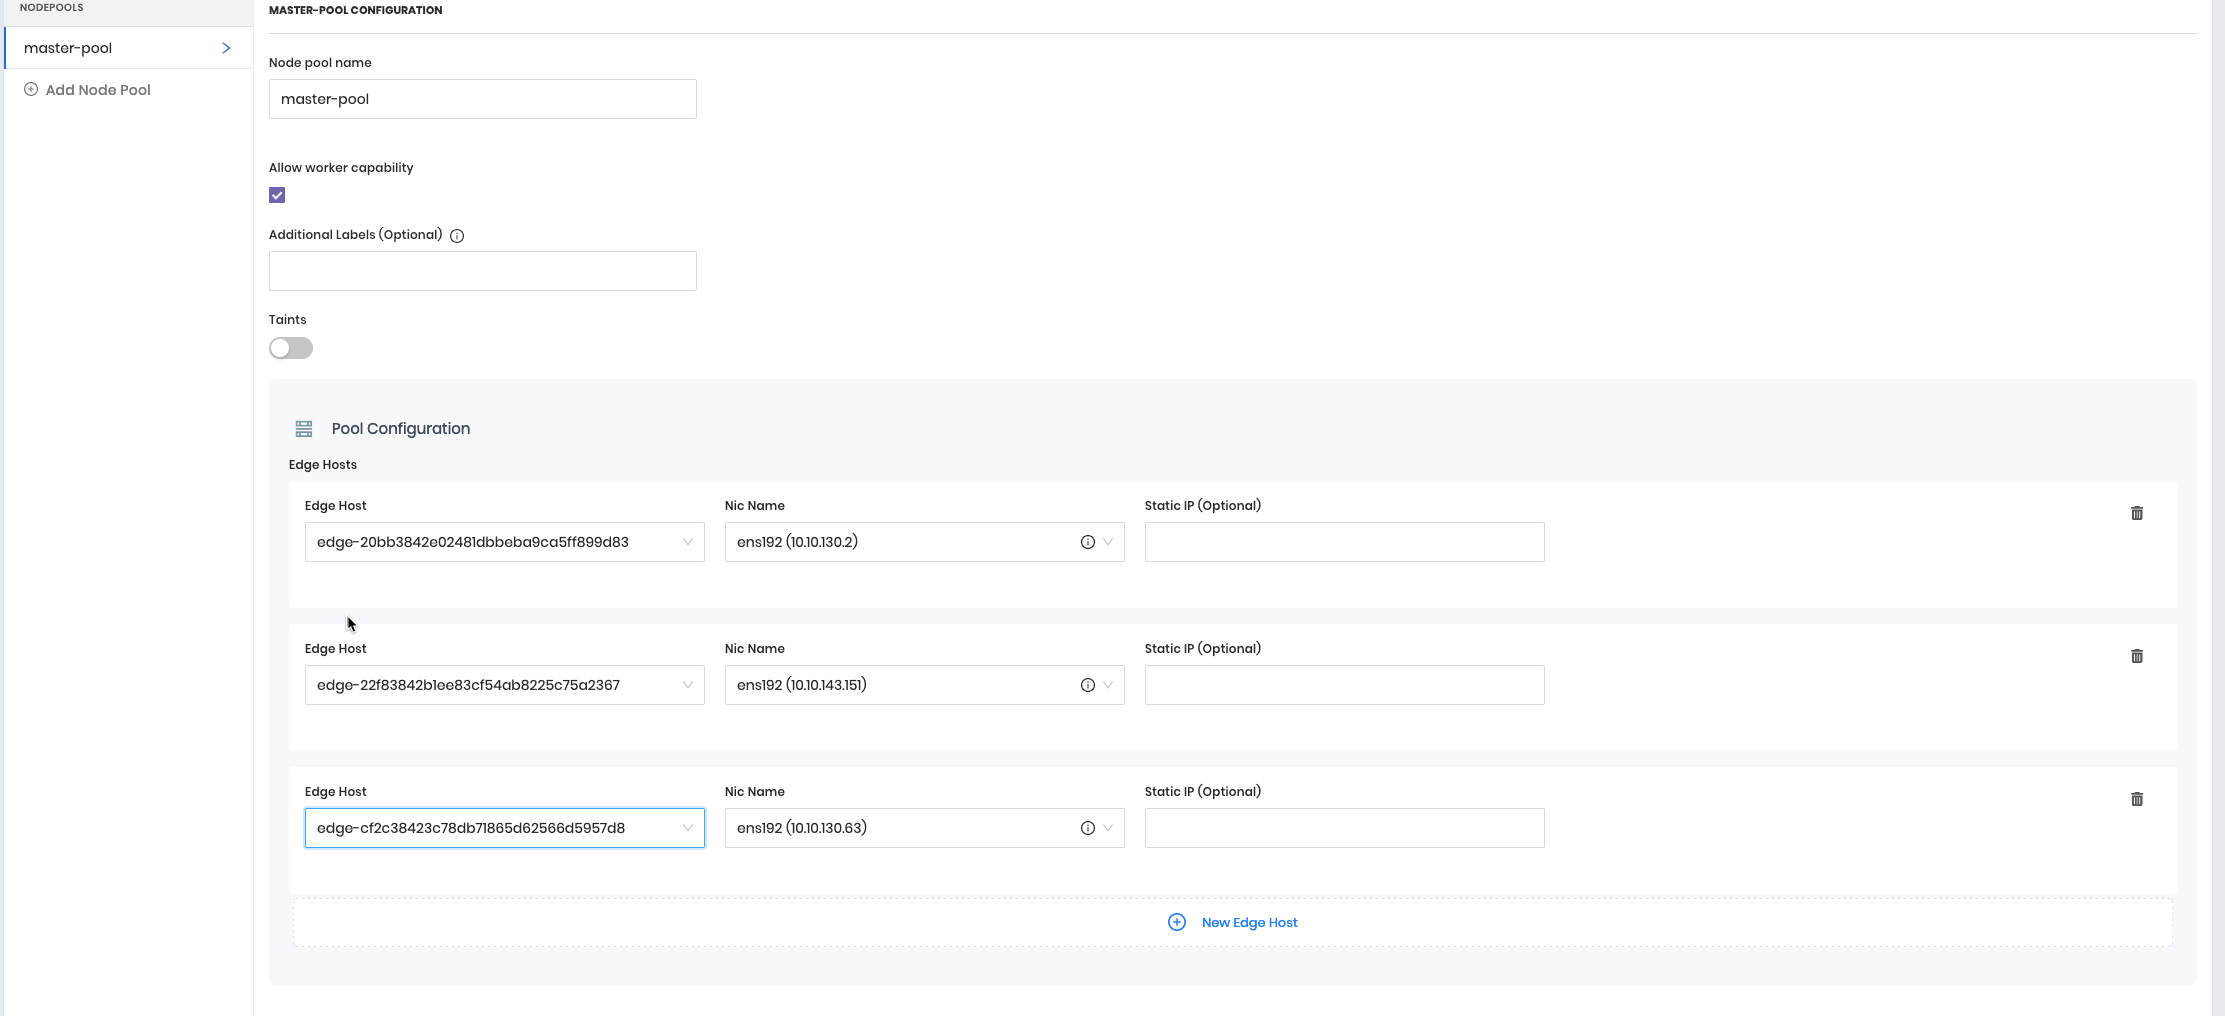
Click Next
- There are other cluster options we can explore that are beyond the scope of this tutorial.
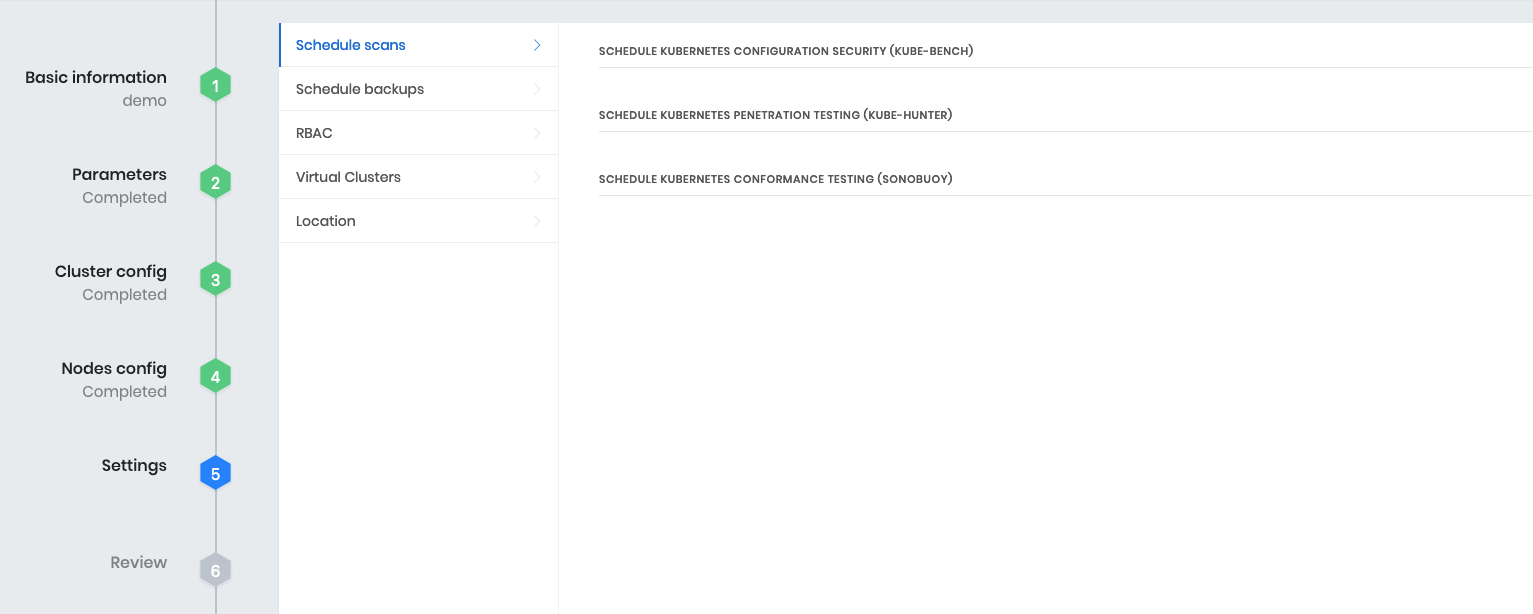
Click Validate
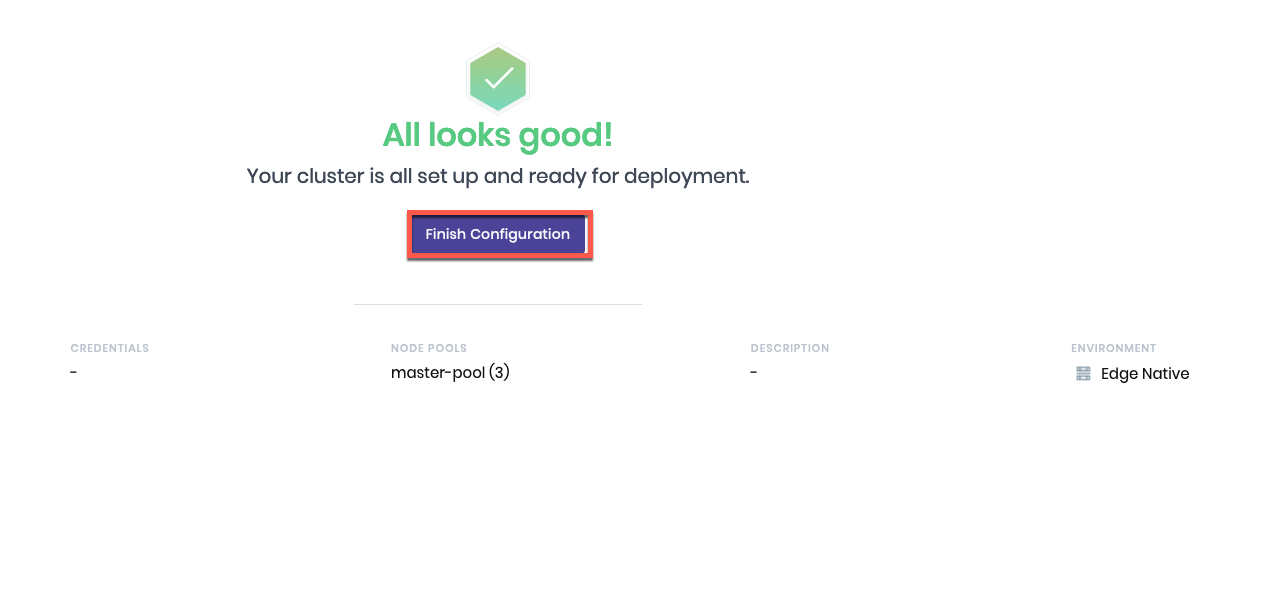
Click Finish Configuration
Monitor the Deployment
- We can monitor the deployment through the events tab. We can drill into the logs of the individual hosts as well.
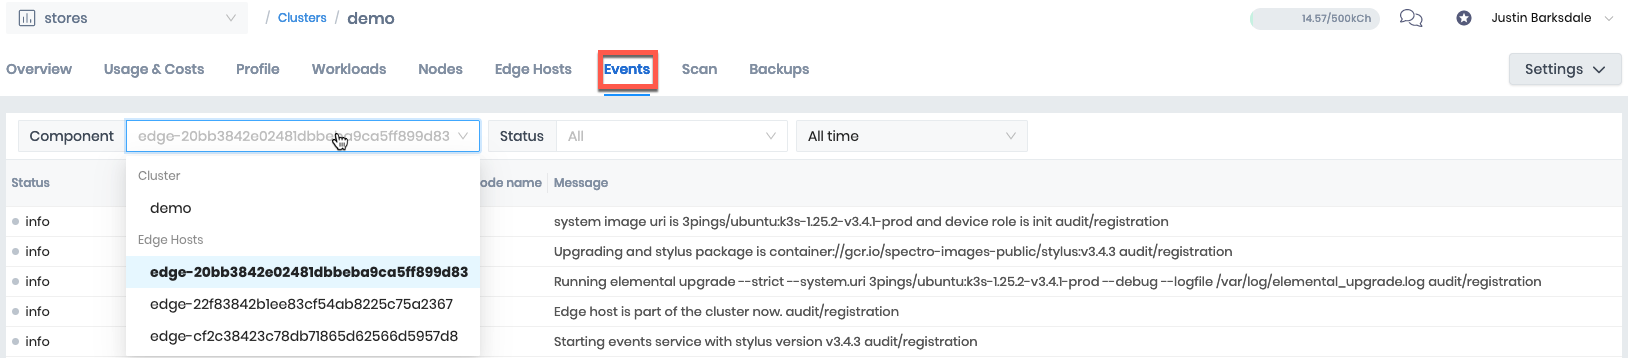
The cluster deployment can take between 5-10 minutes depending on the bandwidth
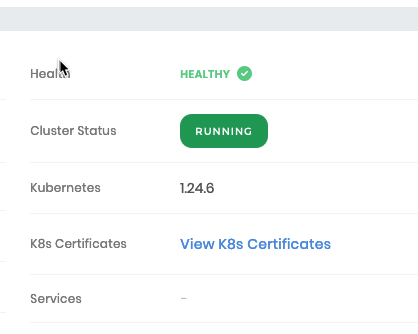
- Verify the cluster is running by monitoring the overview tab for a status of
Ready
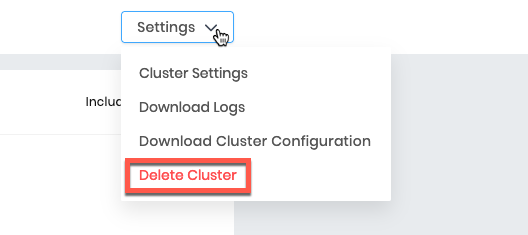
Cleanup
You have now completed the tutorial. You can interact with the cluster by downloading the Kubernetes Config File from the Overview page and using kubectl. Once you are completed exploring you can delete the cluster and the edge hosts. To delete the cluster select Settings Delete Cluster